 Save to Pinterest
 One afternoon, I was standing in my kitchen watching chocolate melt in the microwave when my neighbor stopped by with a bag of leftover rice cakes from some health kick she'd abandoned. I wasn't sure what to do with them at first, but then I thought about the simple equation: crispy texture plus creamy peanut butter plus chocolate equals something nobody would refuse. Twenty minutes later, I had a tray of frozen bites that tasted like someone had engineered the perfect snack. They disappeared so fast I had to start keeping a secret stash in the back of the freezer.
I made these for my sister's book club meeting last month, and they became the thing people actually talked about instead of the books. Someone asked if I'd bought them from a fancy bakery, which was hilarious because they cost about three dollars to make. That moment reminded me that simple doesn't mean forgettable—sometimes the most memorable treats are the ones that don't pretend to be complicated.
Ingredients
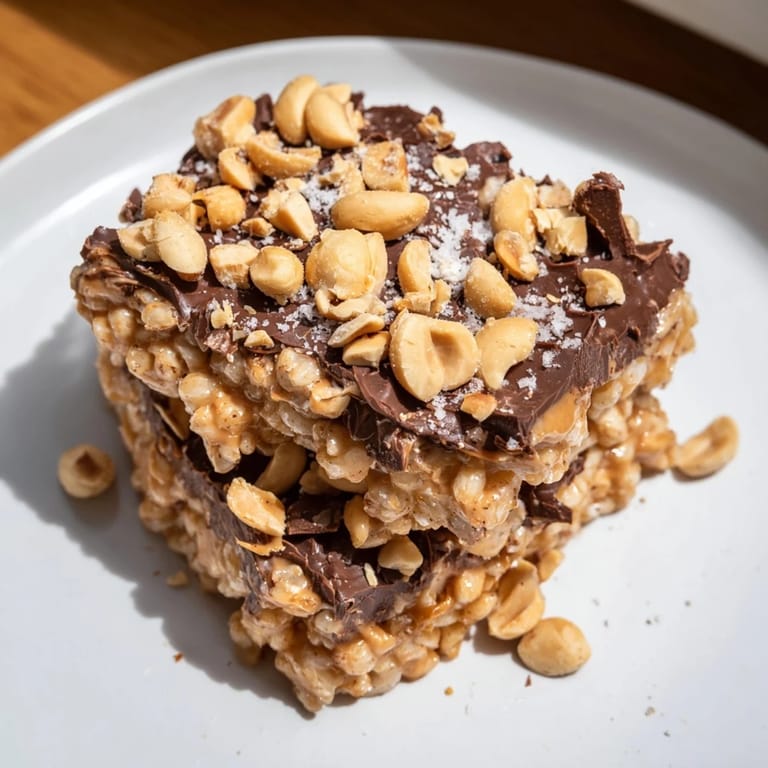
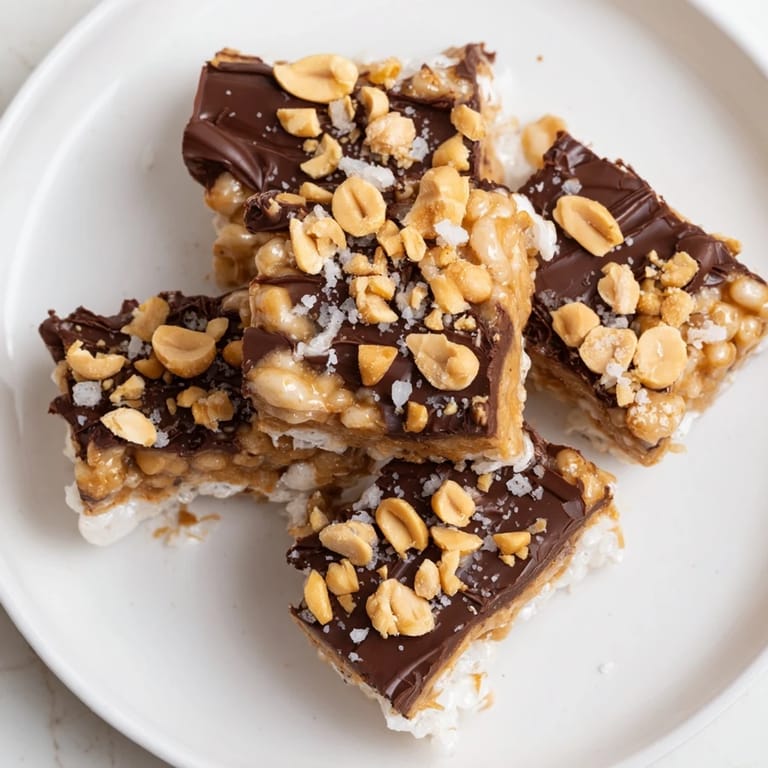
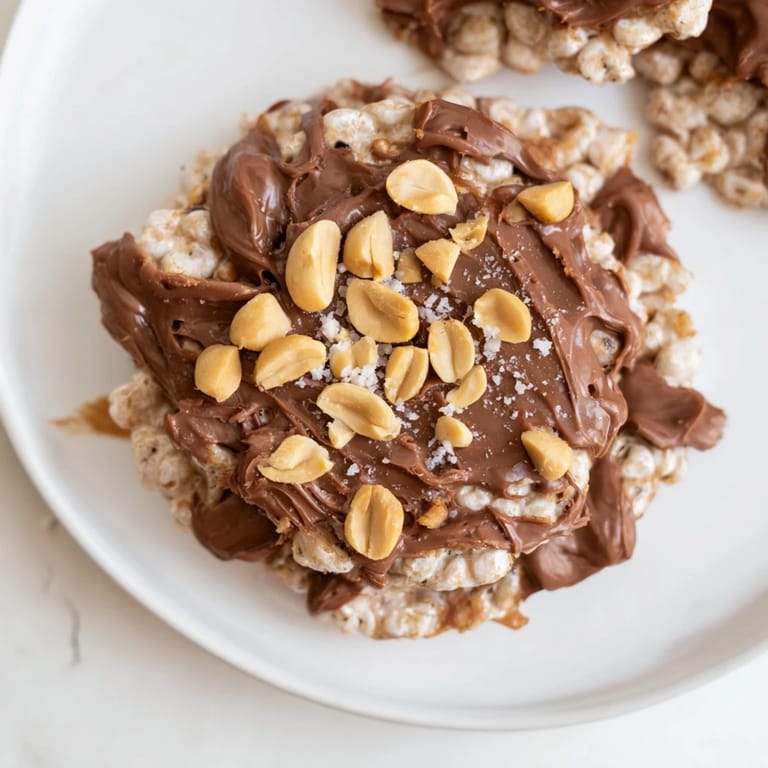
- Rice Cakes: Three large ones give you enough surface area to coat generously; they're the sturdy foundation that keeps everything together when frozen.
- Creamy Peanut Butter: Six tablespoons spread across the rice cakes in an even layer is the sweet spot—thick enough to taste rich, thin enough that the rice cake still has something to say.
- Semi-Sweet or Dark Chocolate: A hundred grams, chopped small so it melts evenly; dark chocolate skews more sophisticated, but semi-sweet feels more like a treat.
- Coconut Oil: Just a tablespoon helps the chocolate flow and set smoothly, though it's optional if you're okay with slightly thicker chocolate.
- Roasted Peanuts and Sea Salt: These are optional garnishes, but the peanuts add texture and the salt somehow makes the sweetness sing.
Tired of Takeout? 🥡
Get 10 meals you can make faster than delivery arrives. Seriously.
One email. No spam. Unsubscribe anytime.
Instructions
- Prepare Your Station:
- Line a baking sheet with parchment paper—this step saves you from a chocolate-stuck-to-metal situation that's no fun to clean. Think of it as setting yourself up for success before anything gets messy.
- Break and Arrange:
- Snap each rice cake into large chunks or squares so they fit on your tray in a single layer. You want them close but not touching, giving you room to spread without overlap.
- Spread the Peanut Butter:
- Put about a tablespoon of peanut butter on each piece and spread it smooth with the back of a spoon. Don't overthink it; rustic coverage tastes just as good as perfect coverage.
- Melt the Chocolate:
- In a microwave-safe bowl, combine chopped chocolate and coconut oil in 20-30 second bursts, stirring between each one until you get a glossy, smooth consistency. This stops you from accidentally burning chocolate, which tastes bitter and regrettable.
- Coat with Chocolate:
- Spoon or drizzle the melted chocolate over each peanut butter-covered piece, making sure every surface gets covered. You want them coated but not swimming; use just enough to create that satisfying chocolate shell.
- Add Finishing Touches:
- If you're using them, sprinkle chopped peanuts and a tiny pinch of sea salt over the wet chocolate. This is where kitchen instinct kicks in—you can make them fancy or keep them simple.
- Freeze Until Set:
- Pop the tray into the freezer for at least 45 minutes, though I usually forget about them for an hour and it's never a problem. The chocolate will go from liquid-looking to firm, and that's your signal they're ready.
- Cut and Store:
- Once frozen solid, slice them into bars or bite-sized pieces depending on your mood. Keep them in an airtight container in the freezer so they stay crisp and don't absorb freezer flavors.
 Save to Pinterest
 There's something about offering someone one of these and watching their face when they bite through the chocolate shell and hit the creamy peanut butter layer. It feels like a small act of generosity that costs almost nothing but feels like you made something special. That's the kind of recipe worth keeping around.
Why This No-Bake Approach Works
There's real freedom in not needing an oven or any advanced baking skills. I think about the people who avoid making desserts because they're intimidated by temperature control and timing, and this recipe completely sidesteps that anxiety. You're just assembling, melting, and freezing—three things anyone can do. The hardest part is waiting for the freezer to do its job, and even that's not really hard.
Flavor Variations That Actually Work
Once you understand how this comes together, you realize you can play around without breaking anything. I've swapped almond butter for peanut butter and the result felt more elegant somehow, like it was apologizing for being so easy to make. A drizzle of honey or maple syrup into the peanut butter layer adds sweetness that builds slowly, so you're not hit with a sugar rush but a gentle, lingering sweetness. The sea salt is the quiet hero—it transforms these from candy into something that feels intentional.
Keeping Them Perfect and On Hand
The freezer is your friend here, and I mean that sincerely. These actually improve when frozen solid because the chocolate becomes snappier and the layers feel more defined when you bite through. I've kept them frozen for two weeks without any flavor loss, which means you can make a batch on Sunday and have a ready-made snack for those moments when hunger hits and you want something that tastes like you put thought into it.
- Always wrap them individually or separate layers with parchment so they don't stick together in storage.
- Serve them straight from the freezer—they'll thaw slightly in your mouth and release flavor in stages, which is the whole point.
- If you're storing chocolate-covered anything, make sure your freezer doesn't smell like fish or old coffee, because frozen things absorb those notes faster than you'd think.
 Save to Pinterest
 These rice cake bites taught me that sometimes the best recipes are the ones that take almost no time but feel like a small treat you'd get from somewhere fancy. Keep making them, share them with people you like, and don't overthink the details.
Recipe FAQs
- → Can I substitute the peanut butter with other nut butters?
Yes, almond or cashew butter can be used as alternatives for a different flavor profile.
- → What type of chocolate works best for melting?
Semi-sweet or dark chocolate melts smoothly and pairs well with the peanut butter layer.
- → How long should I freeze the bars before serving?
Freeze for at least 45 minutes until the chocolate layer is fully set and firm.
- → Can I make these bars vegan-friendly?
Use dairy-free chocolate and ensure the peanut butter contains no animal products for a vegan option.
- → Are there any allergen concerns to keep in mind?
These bars contain peanuts and may contain traces of tree nuts, soy, and milk depending on the ingredients used.