 Save to Pinterest
 There's a particular quiet that settles over a kitchen on a cool afternoon when you're learning to make something new, and that's exactly where I was when I first encountered hojicha mousse. A friend had brought back a small container from a Japanese pastry shop, and one spoonful shifted something in how I thought about desserts—suddenly, air and restraint felt more luxurious than richness. I became obsessed with recreating that delicate texture, that subtle roasted warmth that lingered without overwhelming. After a handful of attempts and one memorable collapse involving overzealous whipping, I finally understood the dance between technique and intuition that makes this mousse sing.
I made this for my sister's book club one evening, and watching five people simultaneously close their eyes on the first spoonful told me everything—there's something about hojicha that makes people slow down and actually taste what's in front of them. The conversation that night drifted into quiet moments of appreciation, and honestly, that's when I knew this recipe had become something worth holding onto.
Ingredients
- Hojicha tea leaves (2 tablespoons): The soul of this dessert; the roasting process gives hojicha its warm, slightly nutty character that transforms when steeped into milk. If you can only find hojicha powder, use 1 tablespoon and sieve it twice before using.
- Whole milk (200 ml): The canvas for hojicha's flavor; whole milk carries the tea's delicate notes without thinning them out.
- Eggs, separated (3 large): The structure and lift—yolks create a custard base while whites become the cloud that makes this mousse feel almost weightless. Use room temperature eggs for better volume when whipping.
- Granulated sugar (60 g total): Divided between yolks and whites, it sweetens without overpowering the hojicha's subtle taste.
- Vanilla extract (1 teaspoon): A quiet enhancer that rounds out the hojicha without announcing itself.
- Cornstarch (1 tablespoon): It stabilizes the custard and keeps the texture silky rather than grainy.
- Powdered gelatin (2 teaspoons): The invisible hand that holds everything together, giving the mousse its gentle set without heaviness. Bloom it properly or you'll end up with clumps.
- Cold water (2 tablespoons): For blooming gelatin—cold water is non-negotiable here.
- Hojicha tea leaves or cocoa nibs for garnish: A finishing touch that adds visual appeal and a hint of textural contrast.
Tired of Takeout? 🥡
Get 10 meals you can make faster than delivery arrives. Seriously.
One email. No spam. Unsubscribe anytime.
Instructions
- Steep the hojicha into warmth:
- Heat the milk gently until you see wisps of steam rising, then scatter in the hojicha leaves and cover. Let it sit undisturbed for 10 minutes—the longer steep extracts deeper flavor. Strain carefully through a fine mesh and let it cool slightly while you move on.
- Wake up the gelatin:
- Sprinkle gelatin over cold water in a small bowl and let it sit for 5 minutes until it looks like a sponge; this blooming step prevents lumps later.
- Build the custard base:
- Whisk egg yolks with 30 g sugar and cornstarch until pale and slightly thick, then slowly pour in the warm hojicha milk while whisking constantly. This gradual addition prevents the yolks from scrambling.
- Cook over gentle heat:
- Set your bowl over simmering water and whisk for 3 to 5 minutes until the mixture coats the back of a spoon and feels slightly thicker. You're looking for that moment when it transitions from liquid to custard.
- Dissolve the gelatin:
- Remove from heat and immediately stir in the bloomed gelatin until no grainy bits remain, then add vanilla. Let it cool to room temperature, stirring now and then—this prevents a skin from forming and ensures even texture.
- Whip the whites into clouds:
- In a very clean bowl, beat egg whites until soft peaks curl over when you lift the whisk, then gradually add the remaining 30 g sugar and continue until stiff, glossy peaks form. Don't over-beat or they'll become grainy.
- Fold with care and intention:
- Add the egg whites to the cooled hojicha mixture in three additions, folding gently with a spatula after each addition. This keeps the mousse airy instead of deflating it into heaviness.
- Set it in stillness:
- Spoon into serving glasses or ramekins and refrigerate for at least 2 hours until the mousse firms up into something you can eat with a spoon rather than sip.
- Finish with intention:
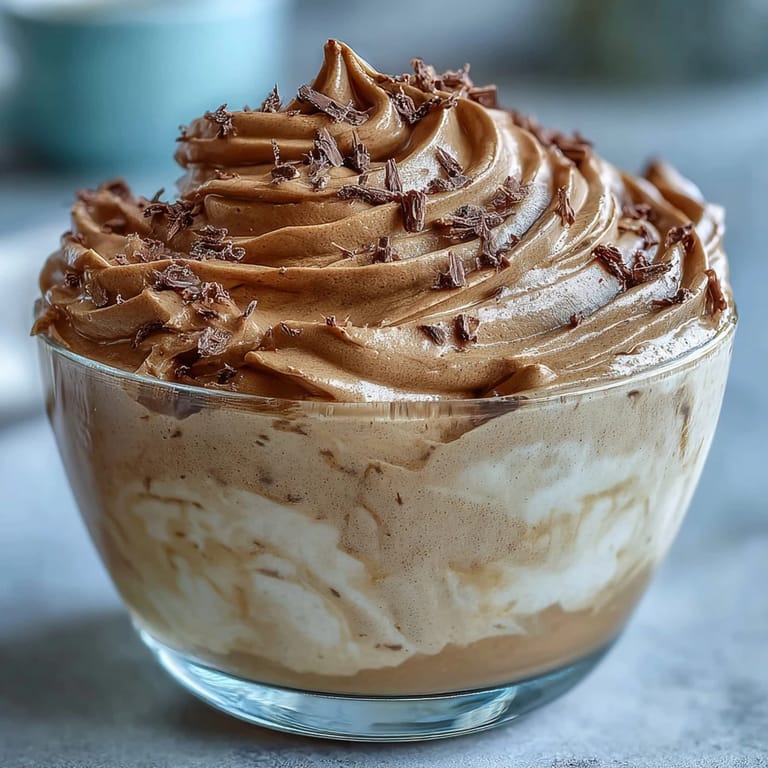
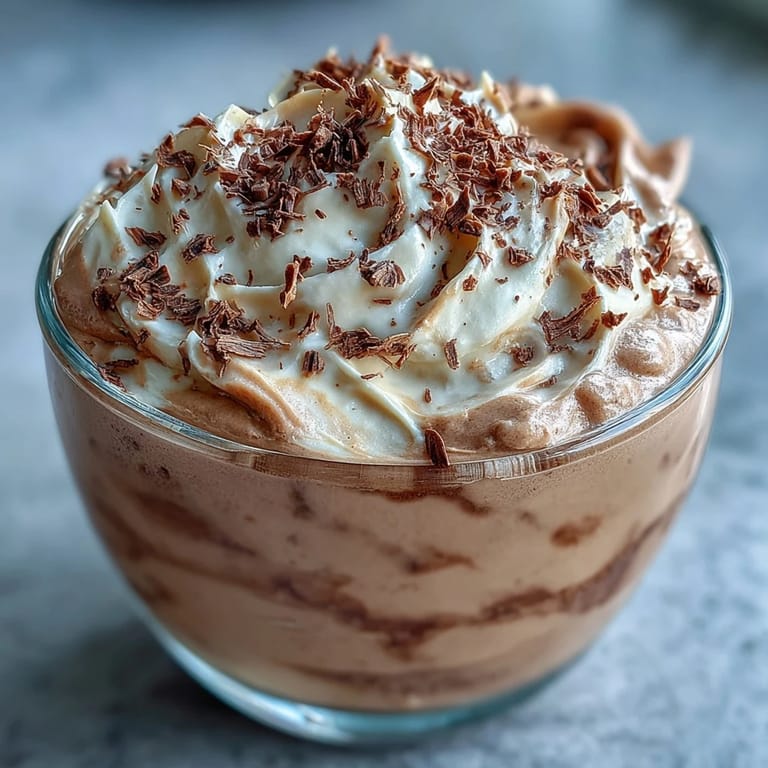
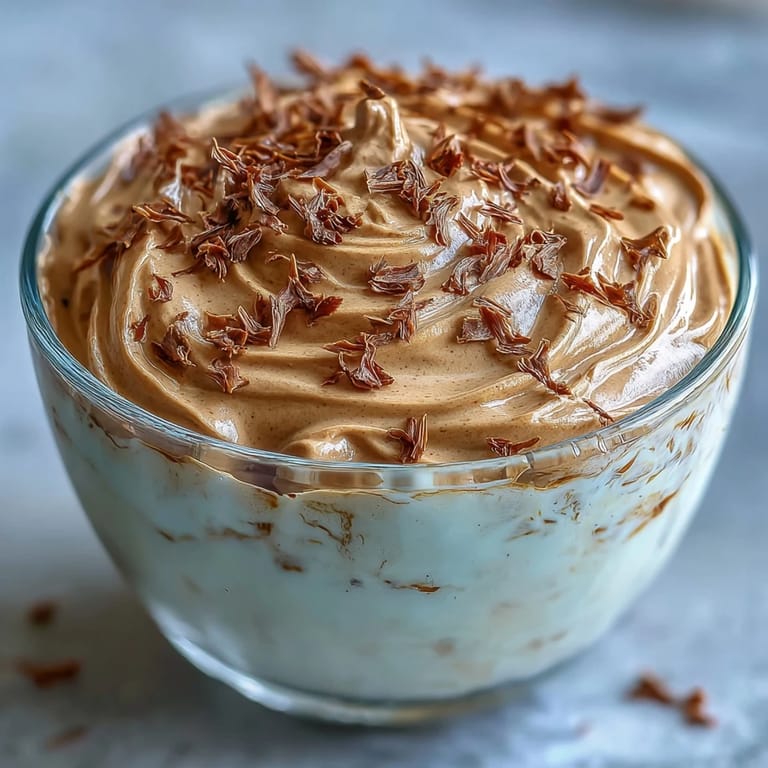
- Just before serving, sprinkle a pinch of toasted hojicha or cocoa nibs on top for a whisper of texture and visual elegance.
 Save to Pinterest
 There was a night when I made this mousse for a quiet dinner after a difficult week, and eating it alone at my kitchen counter while steam rose from a fresh cup of tea felt like the most restorative thing I could have done. Sometimes the best recipes are the ones that remind us to pause and savor.
The Art of Not Overdoing It
Hojicha mousse taught me that dessert doesn't need to shout to be memorable. The restraint here—no cream, no chocolate, no complicated techniques—creates space for one flavor to bloom fully. I used to think elegance required more, but this dessert whispered that philosophy into something I finally understood.
Milk Matters More Than You'd Think
The quality of your milk shapes this entire dessert because it's the primary vehicle for hojicha's flavor. I once used ultra-pasteurized milk and noticed the hojicha tasted muted, almost flat. Switching to regular whole milk brought back that round, toasted warmth that makes people pause mid-conversation. If you're dairy-free, oat milk carries hojicha beautifully, while almond milk can sometimes add an unexpected brightness that's interesting but different.
Serving Suggestions and Moments
This mousse shines when served cold on a warm day, or as a palate cleanser after a richer meal. I've served it in small glasses with a berry compote alongside, and I've plated it simply with just a whisper of garnish, and both felt right depending on the moment.
- Pair with a light floral sake or delicate green tea to echo the hojicha's roasted character.
- Fresh berries add a bright contrast that makes the hojicha taste even more refined by comparison.
- Make this a day ahead if you like—it actually sets more beautifully with extra time in the cold.
 Save to Pinterest
 This recipe is an invitation to slow down and taste the world more carefully. Make it when you want to feel a little lighter, a little more present.
Recipe FAQs
- → What makes hojicha unique compared to other Japanese teas?
Hojicha is roasted green tea leaves, creating a distinctive nutty, caramel-like flavor with lower caffeine content. The roasting process reduces bitterness and produces warm, toasty notes that pair beautifully with creamy desserts.
- → Can I prepare this mousse ahead of time?
Absolutely. This mousse sets beautifully and can be prepared up to 24 hours in advance. Store covered in the refrigerator and garnish just before serving for the best presentation and texture.
- → What can I use instead of gelatin?
Agar-agar works as a vegetarian alternative, though the texture will be slightly firmer. Use about 1 teaspoon powdered agar-agar dissolved in the hot milk mixture instead of gelatin.
- → Why separate the eggs instead of using whole eggs?
Separating eggs allows you to create a rich custard base with yolks while incorporating whipped whites for airy texture. This technique produces that signature light, cloud-like consistency without needing heavy cream.
- → How do I know when the custard is thick enough?
The custard is ready when it coats the back of a wooden spoon and leaves a clear trail when you run your finger through it. This typically takes 3-5 minutes of constant whisking over simmering water.
- → What garnishes complement this mousse best?
Toasted hojicha leaves add authentic crunch and intensified flavor. Cocoa nibs provide a bitter contrast, fresh berries offer brightness, and lightly whipped cream creates an elegant finish.