 Save to Pinterest
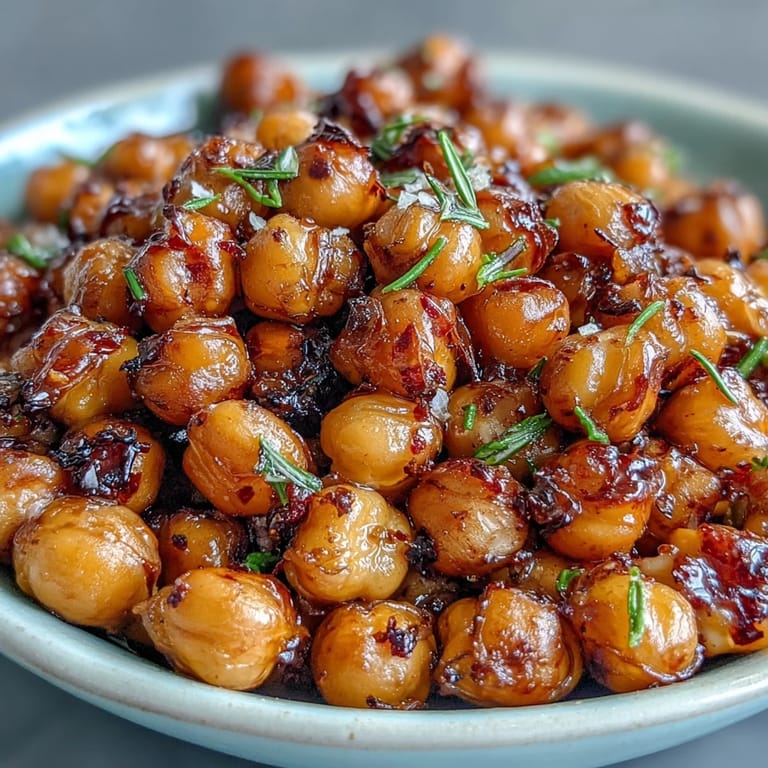
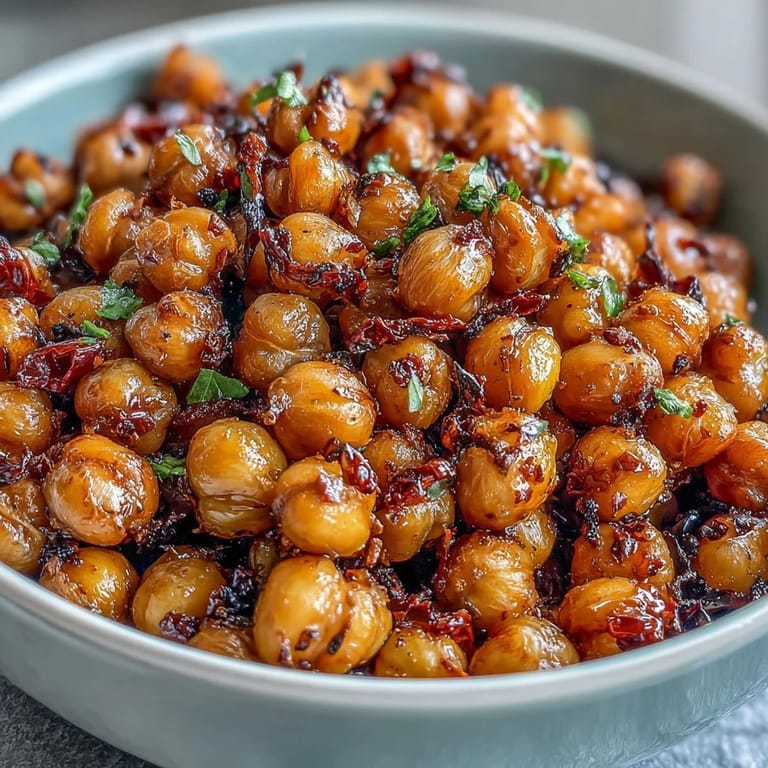
 My roommate came home one evening to find our tiny kitchen smelling like a spice market, and I was standing there with a baking sheet of golden chickpeas that literally crunched under my fingers. She stole a handful before I could even explain what I'd made, and that's when I knew I'd stumbled onto something special. These crispy baked chickpeas are so ridiculously easy that I almost felt like I was cheating, yet somehow they taste like they came from somewhere fancy. The best part? You get to choose your own adventure with three completely different flavor profiles, so they never get boring.
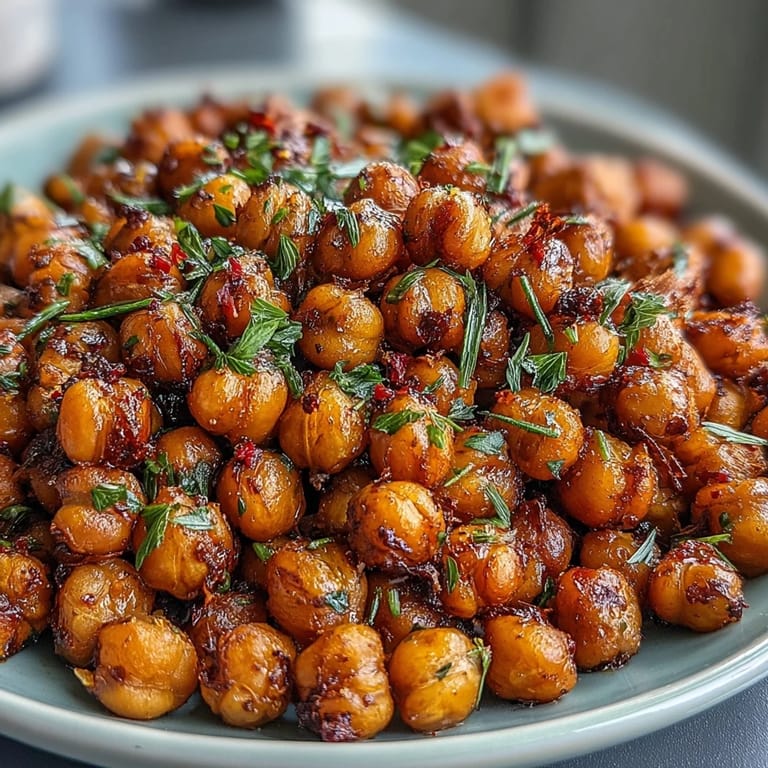
I brought a container of the smoky paprika version to a potluck once, expecting them to sit untouched while everyone grabbed the brownies and dips. Instead, people kept circling back, asking if there were any left, and someone actually asked me for the recipe right there at the snack table. That's when I realized these humble chickpeas had somehow become the sneaky star of the show, proving that sometimes the simplest things are exactly what people are hungry for.
Ingredients
- Chickpeas: Two cans drained and rinsed are your starting point, though you absolutely must pat them completely dry with a kitchen towel or they'll steam instead of crisping up.
- Olive oil: Just two tablespoons is all you need to coat them lightly and help them toast beautifully.
- Fine sea salt: For the classic version, a light hand with salt is better because you can always add more but you can't take it back.
- Smoked paprika: This is your ticket to that complex, almost smoky flavor that makes people guess what the secret ingredient is.
- Ground cumin: A quarter teaspoon adds warmth and depth without overpowering the other spices.
- Garlic powder: Skip the fresh here and use powder so it toasts with the chickpeas instead of burning.
- Chili powder: For the spicy version, this gives you heat with actual flavor instead of just a punchy kick.
- Lime zest: Fresh lime zest brings brightness that cuts through the richness and makes everything feel lighter.
- Cayenne pepper: Optional, but I always add a pinch because life is short and chickpeas can handle the heat.
Tired of Takeout? 🥡
Get 10 meals you can make faster than delivery arrives. Seriously.
One email. No spam. Unsubscribe anytime.
Instructions
- Heat your oven and prepare:
- Get your oven to 400°F and line a baking sheet with parchment paper so cleanup is basically nonexistent. This matters more than you'd think because you'll actually make these again if you're not scrubbing a pan afterward.
- Dry your chickpeas completely:
- Take your drained, rinsed chickpeas and pat them thoroughly dry with a clean kitchen towel, really going at it like you mean it. This step is what separates crispy, golden chickpeas from sad, soft ones, and yes, it absolutely matters.
- Coat with oil:
- Toss the dried chickpeas with olive oil on your prepared baking sheet, making sure each one gets a light coating. Spread them out in a single layer so they roast instead of steam.
- Bake until golden:
- Roast for 25 to 30 minutes, shaking the pan about halfway through so everything cooks evenly. You're looking for them to turn golden brown and feel crispy when you squeeze one gently.
- Season while warm:
- Pull them from the oven and immediately toss with whichever seasoning blend you've chosen: simple sea salt, the smoky paprika blend, or the bright chili lime combination. The warmth helps the seasonings stick and distribute evenly.
- Optional final crisp:
- If you want them extra crunchy, return them to the oven for another 5 minutes, though honestly most people skip this and they're already perfect. Your call.
- Cool completely:
- Let them sit on the baking sheet until they've cooled all the way down, and they'll crisp up even more as they cool. Transfer to an airtight container once they're completely cool.
 Save to Pinterest
 There was a moment during my meal prep Sunday when I made all three flavor variations at once, and my kitchen became this wild flavor laboratory where every time I grabbed a handful from a different container, my taste buds went somewhere completely different. I realized then that these chickpeas aren't just a snack you make once and forget about, they're something you can actually have fun with, experimenting and figuring out which version becomes your go-to favorite.
Finding Your Favorite Flavor
The classic sea salt version is perfect if you want to taste the chickpeas themselves, just roasted and slightly salty, almost like the stripped-down version that lets everything else shine. The smoky paprika blend leans warm and cozy, reminding me of Spanish food and those flavors that make you feel like you're somewhere else entirely, even if you're just sitting at your kitchen counter. The spicy chili lime is bright and a little dangerous, cutting through rich foods perfectly, which is why I always make a batch right before I make something heavy and creamy.
How to Store Them and Keep Them Crispy
An airtight container in your pantry keeps them crunchy for a full day, maybe a day and a half if you're lucky and the weather isn't humid. After that, they start getting softer, but here's the thing I discovered: you can literally just spread them on a baking sheet and give them five minutes at 350°F to bring back the crunch, so they're never really gone forever.
Ways to Use Them Beyond Snacking
I used to think of these only as a snack, but I started tossing them on salads and suddenly my lunch became something I actually looked forward to instead of dreaded. They work as a soup garnish where they add crunch that makes every spoonful more interesting, and I've even seen people crumble them over grain bowls to add protein and texture. The possibilities keep expanding the more you make them and start thinking beyond the obvious snacking angle.
- Crumble them over creamy soups to add contrast and a little attitude.
- Toss a handful on green salads right before serving so they stay crispy.
- Mix them into trail mix with nuts, dried fruit, and a little dark chocolate for something addictive.
 Save to Pinterest
 These chickpeas have become my go-to snack when I need something satisfying that doesn't require any actual cooking talent, and they've somehow made me feel like a kitchen genius every time I make them. If you're looking for something that's ridiculously easy, genuinely delicious, and impossible to mess up, this is it.
Recipe FAQs
- → How do I get chickpeas extra crispy?
Pat chickpeas very dry before baking and spread them evenly on the sheet to ensure they roast evenly and become crisp.
- → What are good flavor options for baked chickpeas?
Try classic sea salt, smoky paprika with cumin and garlic, or spicy chili lime with zest and cayenne for varied tastes.
- → Can I prepare chickpeas ahead of time?
Yes, baked chickpeas can be stored in an airtight container but are best enjoyed fresh for optimal crunchiness.
- → Are baked chickpeas suitable for vegan and gluten-free diets?
Absolutely, using simple plant-based ingredients and no gluten, they fit both vegan and gluten-free requirements.
- → What are some tools needed for preparing baked chickpeas?
A baking sheet, parchment paper, a kitchen towel to dry chickpeas, mixing bowls, and a spoon or spatula are all useful.