 Save to Pinterest
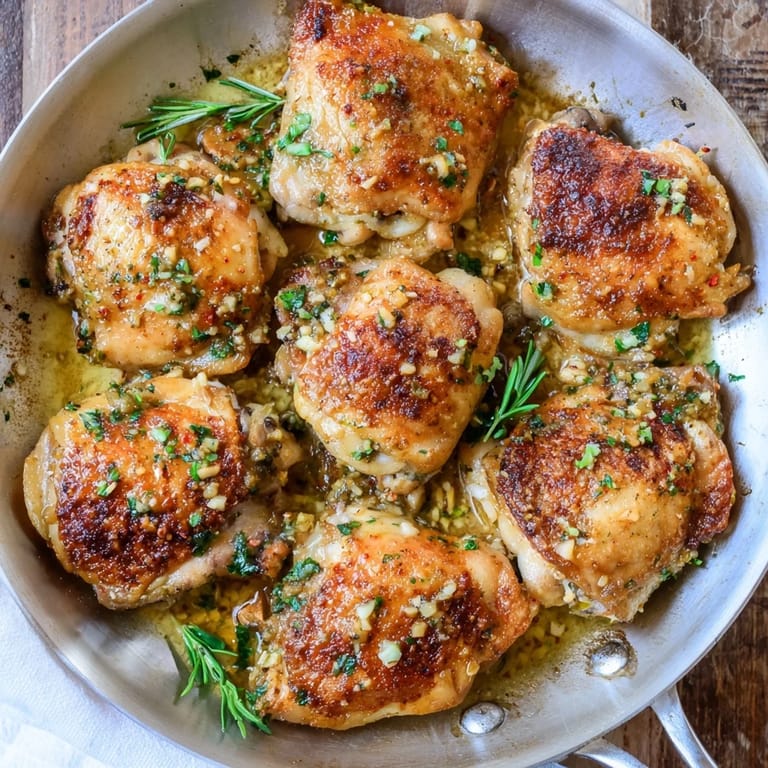
 The first time I made these garlic butter chicken thighs was during an unexpected thunderstorm that kept us housebound on a Saturday evening. The rain pounded against the kitchen window while the aroma of roasting garlic and herbs filled every corner of our home, creating this incredible contrast between the chaos outside and the comfort within. My daughter wandered into the kitchen following the scent trail, eyes widening as she watched me baste the sizzling chicken with that golden butter sauce. That storm became a blessing in disguise—it forced us to slow down and savor something truly delicious.
Last winter, I made these chicken thighs for my brother when he visited after a rough week at work. We hadnt spoken much lately, caught in our separate busy lives. As we sat at the table, he took a bite and just stopped mid-sentence, giving me that look of pure food bliss. The conversation flowed easier after that, somehow the simple act of sharing this meal bridged the distance that had grown between us. By the time he scraped the last bit of garlic butter from his plate, we were laughing like old times again.
Ingredients
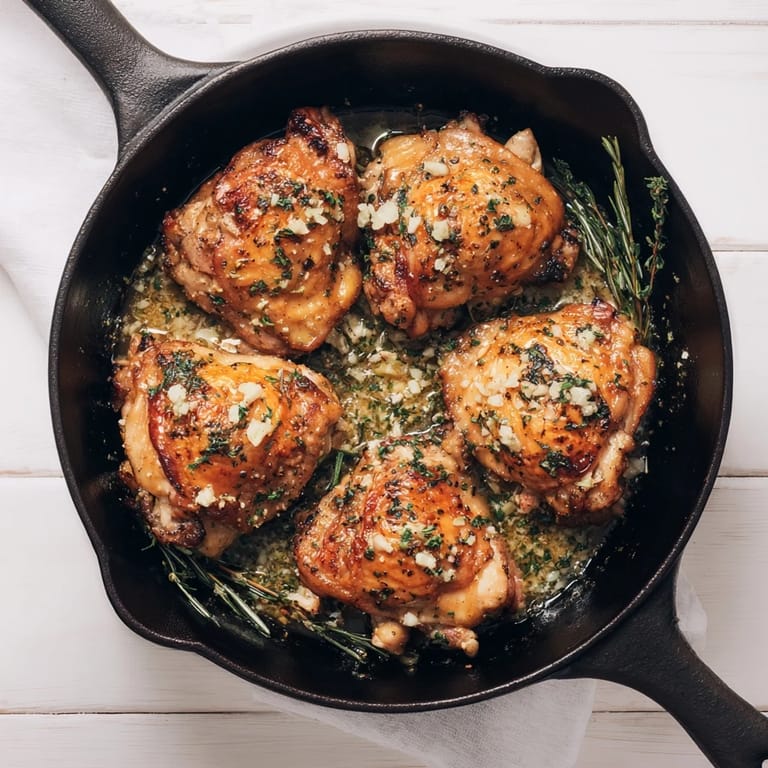
- 8 bone-in, skin-on chicken thighs: The bone keeps the meat juicy while the skin turns into this incredible crispy layer that holds all the flavor, a lesson I learned after trying boneless thighs that just werent the same.
- 4 tablespoons unsalted butter: Using unsalted lets you control the saltiness perfectly, and I discovered after many attempts that melting it completely rather than just softening makes it absorb the herbs better.
- 5 cloves garlic, minced: I accidentally doubled the garlic once and honestly, it was even better, so dont be shy here.
- Fresh herbs (parsley, rosemary, thyme): The combination creates this aromatic magic that dried herbs alone cant quite achieve, though dried will work in a pinch.
- Paprika: It adds this subtle smoky depth and beautiful color that makes everyone think you worked much harder than you did.
Tired of Takeout? 🥡
Get 10 meals you can make faster than delivery arrives. Seriously.
One email. No spam. Unsubscribe anytime.
Instructions
- Prep the stars of the show:
- Pat those chicken thighs dry with paper towels like youre giving them a gentle spa treatment. The drier the skin, the crispier the result, and trust me, that satisfying crunch is worth the extra minute of patting.
- Create your flavor bomb:
- Stir together the melted butter, minced garlic, and chopped herbs until the mixture looks like a gorgeous green-flecked gold. This is where the magic happens, as the warmth of the butter releases all those aromatic oils.
- Season with purpose:
- Mix your paprika, salt, black pepper, and onion powder in a separate bowl. These will create a savory foundation that complements the richness of the garlic butter.
- Get handsy:
- Rub the seasoning mix all over those chicken thighs like youre giving them a little massage. Make sure to get under the skin a bit where possible, creating flavor pockets that will make you swoon later.
- Arrange for success:
- Place the chicken thighs skin-side up in your baking dish, giving them just enough space to breathe. They should be cozy but not overcrowded, like good friends at a dinner party.
- Butter bath time:
- Pour that gorgeous garlic butter over each thigh, using your fingers to gently lift the skin and make sure some of that liquid gold gets underneath. This step feels a bit intimate but the flavor payoff is worth any awkwardness.
- Into the heat:
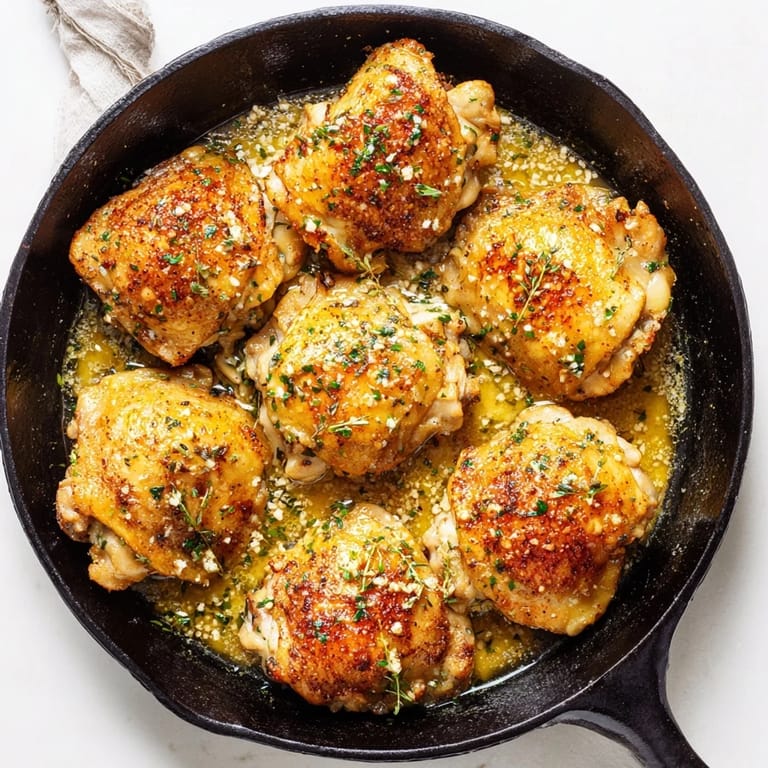
- Roast in your preheated oven until the skin turns golden brown and crispy, about 35-40 minutes. Your kitchen will fill with an aroma so good youll want to bottle it as perfume.
- The crispy finale:
- For that extra textural magic, broil for the final few minutes while watching like a hawk. Ive learned the hard way that the difference between perfectly caramelized and sadly burned is about 30 seconds.
- Rest and garnish:
- Let the chicken rest before serving, then sprinkle with fresh parsley and add lemon wedges on the side. The chicken will release its juices, creating an even more flavorful sauce at the bottom of the dish.
 Save to Pinterest
 One evening after a particularly exhausting day, I threw these chicken thighs together on autopilot, barely paying attention to what I was doing. My mind was still caught in work problems as we sat down to eat. Then my husband took a bite and reached for my hand across the table, saying nothing but giving me that look that said everything. Sometimes the most profound connections happen over the simplest meals, and these garlic butter chicken thighs have become our shorthand for Im here with you in this moment.
Making Ahead and Storage Tips
Ive learned through countless meal prep Sundays that you can prepare the garlic butter mixture up to three days ahead and keep it in the fridge, though youll need to warm it slightly before using since it solidifies. The seasoning mix can be made even further in advance and stored in a small jar, becoming your own signature chicken blend. After cooking, leftover chicken stays remarkably juicy for lunch the next day, unlike chicken breasts that often dry out. Ive even served cold leftovers sliced over a salad when friends dropped by unexpectedly, and they raved about it more than many of my planned meals.
Perfect Pairings
Through plenty of dinner party experimentation, Ive found that these garlicky thighs have a magical affinity for starches that can soak up the buttery pan juices. A simple risotto becomes extraordinary when those golden drippings get stirred in, and even plain white rice transforms into something crave-worthy. For vegetables, anything roasted works beautifully alongside—the high oven temperature means you can cook asparagus, brussels sprouts, or carrots on a separate rack during the last 15 minutes of cooking time. My personal favorite discovery was serving these with roasted grapes and pearl onions, which caramelize and provide sweet bursts that cut through the richness.
Troubleshooting Your Chicken
After making this recipe more times than I can count, Ive encountered and solved nearly every possible issue. Pale, not-crispy skin usually means your oven temperature is too low or the chicken was overcrowded in the pan, so make sure your oven is fully preheated and give those thighs some breathing room. If your garlic burns and tastes bitter, youre likely putting the dish too close to the top heating element, so adjust your oven rack to the middle position. And if youre not getting that flavor intensity you crave, try marinating the chicken in just the dry spices for a few hours before cooking.
- Always let your chicken rest for at least 5 minutes after cooking, which allows the juices to redistribute throughout the meat instead of running out when cut.
- If your skin isnt getting crispy enough, make sure your chicken is completely dry before seasoning and consider removing any excess moisture from the pan halfway through cooking.
- For the most flavor-packed result, gently slide some compound butter under the skin just before serving, where the residual heat will melt it into all the meat fibers.
 Save to Pinterest
 This garlic butter chicken has earned its place in our family story, appearing at everything from casual Tuesday dinners to holiday celebrations. Its one of those recipes that reminds us that sometimes the most meaningful moments happen not with fancy techniques or exotic ingredients, but with simple, honest cooking shared with people we love.
Recipe FAQs
- → How do I get crispy skin on the chicken thighs?
Pat the chicken dry before cooking and roast skin-side up at high heat (220°C). For extra crispiness, broil for the last 2-3 minutes, watching carefully to prevent burning.
- → Can I use boneless, skinless chicken thighs?
Yes, boneless thighs work, though they won't develop the same crispy exterior. Reduce cooking time to 25-30 minutes and check for doneness at 165°F internal temperature.
- → What herbs can I substitute for rosemary and thyme?
Oregano, sage, or tarragon work well. You can also use Italian seasoning as a blend. Use 1/3 the amount if substituting fresh herbs with dried versions.
- → How do I make this dairy-free?
Replace unsalted butter with olive oil or avocado oil in equal amounts. The garlic butter flavor will shift slightly, but the chicken will remain tender and flavorful.
- → What sides pair well with this dish?
Roasted vegetables like broccoli, Brussels sprouts, or carrots complement the rich garlic butter. Creamy mashed potatoes or cauliflower rice also make excellent pairing options.
- → Can I prepare this ahead of time?
You can prepare the garlic butter mixture and seasoning blend several hours ahead. Assemble the dish just before roasting for best results and crispy skin.