 Save to Pinterest
 The first time I made chicken katsu, I was trying to recreate that perfect crunch Id experienced at a tiny restaurant in Kyoto. Standing in my kitchen with a package of chicken breasts and a bag of panko, I felt both intimidated and excited. The rhythmic tapping of the meat mallet as I flattened each piece became almost meditative, and the sizzle when the breaded cutlet hit the hot oil made my mouth water instantly. That satisfying crunch when I took the first bite transported me right back to Japan.
Last winter, I made chicken katsu during a snowstorm when friends got stranded at our place. The kitchen windows fogged up as we fried batch after batch, everyone gathering around the stove for warmth and the promise of comfort food. We ended up eating cross-legged on the living room floor, dipping crispy chicken into tonkatsu sauce and laughing as the wind howled outside. Sometimes I think the storm was actually a stroke of luck.
Ingredients
- Chicken breasts: Look for pieces that are relatively even in thickness to begin with, which makes the pounding process much easier and more consistent.
- Panko breadcrumbs: These Japanese-style breadcrumbs are lighter and airier than regular breadcrumbs, creating that signature airy crunch that makes katsu special.
- Worcestershire sauce: This adds a complex umami backbone to the sauce that regular soy sauce alone cant achieve.
- Mirin: This sweet rice wine brings balance to the tangy sauce, but in a pinch, honey works surprisingly well as a substitute.
Tired of Takeout? 🥡
Get 10 meals you can make faster than delivery arrives. Seriously.
One email. No spam. Unsubscribe anytime.
Instructions
- Pound with purpose:
- Place each chicken breast between plastic wrap and gently pound to about 1/2 inch thickness, working from the center outward. Youre looking for even thickness rather than paper-thin meat.
- Set up your assembly line:
- Arrange your breading station in order: flour, beaten egg mixture, then panko. This keeps one hand dry and one hand wet to prevent the dreaded breaded fingers.
- Master the dredge:
- Coat chicken completely in flour, shake off excess, then dip in egg, allowing extra to drip off. Press firmly into the panko, ensuring every bit of surface gets covered.
- Test the oil:
- Drop a few panko crumbs into your heated oil they should bubble actively but not burn instantly. If they sink without bubbling, your oil isnt hot enough yet.
- Fry with patience:
- Slide the cutlet into the oil away from you to prevent splashing. Resist the urge to move it for the first minute so the crust can set properly.
- Sauce it up:
- Whisk together the tonkatsu sauce ingredients until smooth and glossy. The sauce should coat the back of a spoon but still pour easily.
- Slice and serve:
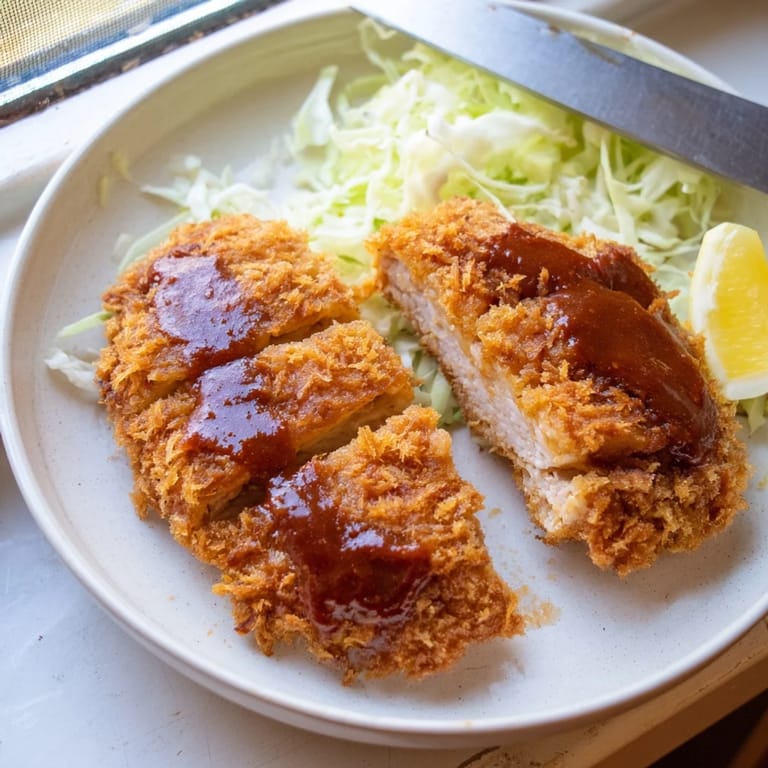
- Let the katsu rest for a minute, then slice into strips across the grain. Arrange over cabbage with sauce drizzled on top or served alongside for dipping.
 Save to Pinterest
 My daughter, who once declared she didnt like chicken, became a convert after I served her chicken katsu in her bento box. Her teacher later told me she proudly explained to her entire class how Japanese children eat this for good luck before exams, which was news to me but incredibly endearing. Now its our traditional first-day-of-school meal, complete with cabbage salad and a little note tucked beside the sauce container.
Perfecting Your Panko Coating
After many attempts at making chicken katsu, Ive learned that the secret to that enviable coating lies in how you apply the panko. Rather than simply dropping the chicken into the breadcrumbs, use your fingertips to gently press the panko onto the surface, almost like youre tucking them into bed. This creates a more even layer and prevents those disappointing bald spots that can happen when the coating slides off during cooking. Some restaurants in Japan actually drizzle a little of the egg mixture over the panko-coated chicken and press again for an extra-thick coating.
Oil Temperature Management
One summer afternoon when my kitchen was particularly hot, I noticed my katsu cooked faster but didnt get as crispy. This taught me the importance of oil temperature in achieving that perfect golden shell. If you dont have a thermometer, use the wooden chopstick test: insert the tip of a wooden chopstick into the oil and if small bubbles form around it steadily, the oil is ready. Too vigorous, and its too hot; no bubbles means its too cool. Starting with slightly cooler oil (around 325°F) and then increasing to 340°F after adding the chicken gives you more control over browning.
Serving Traditions
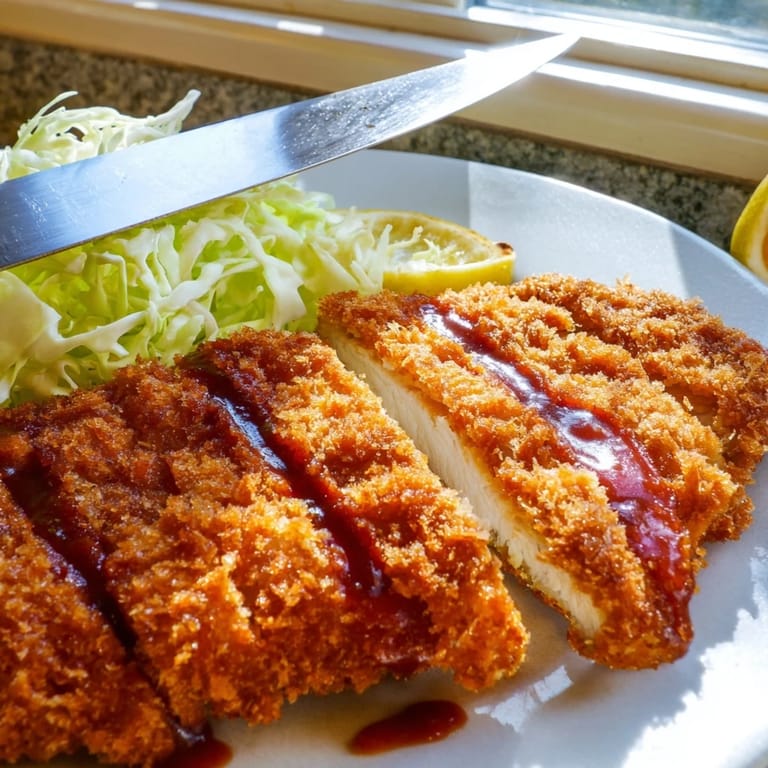
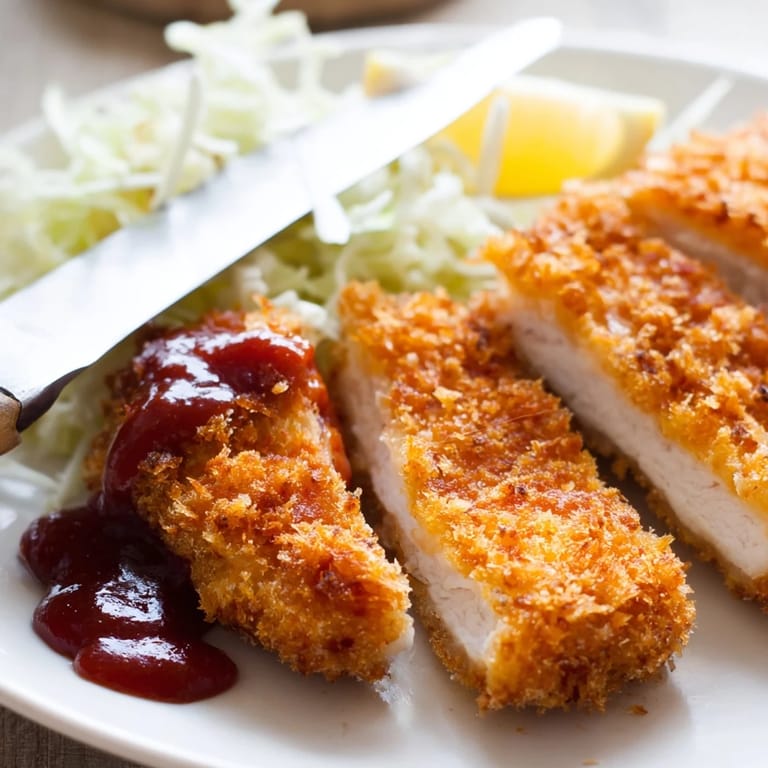
In Japan, the presentation of katsu is almost as important as its taste. The traditional serving includes finely shredded cabbage, which isnt just decorative but serves as a refreshing, crisp counterpoint to the rich fried chicken. After watching my Japanese neighbor prepare it, I realized Id been cutting my cabbage all wrong for years.
- For authentic shredded cabbage, chill the cabbage head first, then use your sharpest knife to cut it into whisper-thin shreds.
- Soak the shredded cabbage in ice water for 5-10 minutes, then drain thoroughly and pat dry for maximum crispness.
- Always serve the tonkatsu sauce on the side rather than pouring it over the chicken so each person can control how much they use and the coating stays crispy longer.
 Save to Pinterest
 This chicken katsu recipe has become more than just a meal in our house its a celebration of crunch, comfort, and care. Whether youre making it for a quiet weeknight dinner or as the centerpiece of a Japanese-inspired feast, that golden moment when knife meets crispy coating is pure kitchen magic.
Recipe FAQs
- → How do I achieve extra crispy panko coating?
For maximum crispiness, let the breaded cutlets rest for 10 minutes before frying. This allows the egg to set and helps the panko adhere better. You can also double-dredge by dipping back into the egg mixture and panko for an even crunchier texture.
- → What's the ideal oil temperature for frying?
Heat oil to approximately 170°C (340°F). Use a thermometer to ensure consistency. If too cool, the coating absorbs excess oil; if too hot, it browns before the chicken cooks through. Test with a small piece of panko—it should sizzle immediately.
- → Can I substitute pork for chicken?
Absolutely. Pork cutlets are traditional for tonkatsu. Use 1/2-inch thick pork loin cutlets and follow the same breading and frying procedure. Cooking time remains similar at 3-4 minutes per side.
- → How do I make tonkatsu sauce from scratch?
Whisk together 1/4 cup ketchup, 2 tablespoons Worcestershire sauce, 1 tablespoon soy sauce, 1 tablespoon mirin (or honey), 1 teaspoon Dijon mustard, and 1 teaspoon sugar. Adjust proportions to taste—add more Worcestershire for depth or mirin for sweetness.
- → What if I don't have panko breadcrumbs?
Regular breadcrumbs work but won't be as crispy. For better texture, pulse regular breadcrumbs in a food processor to coarsen them, or use crushed cornflakes or crispy cereal as alternatives.
- → Should I pound the chicken thin?
Yes, pounding to even 1/2-inch thickness ensures uniform cooking throughout. Thicker centers won't cook before the outside browns. Use a meat mallet between plastic wrap to avoid splatter.