 Save to Pinterest
 The first time I made these olive cheese balls for a backyard Derby party, the aroma of melting cheddar and smoked paprika wafted through the kitchen, sparking my curiosity long before they left the oven. The dough was wonderfully sticky—messier than I anticipated—but pressing it around the briny olives was oddly meditative. Outside, laughter drifted in through the screen door, reminding me that appetizers like these are really just invitations to celebrate together. I couldn’t resist tasting one hot from the tray, just to be sure they were as good as they smelled. Fortunately, my patience paid off: each bite had the perfect snap and warmth, and made me glad I took the chance on something new.
Last spring, I prepped a double batch to bring to my neighbor’s Derby watch party, balancing trays of skewered, golden cheese balls as we navigated a maze of hats and laughter. There was a moment of panic when we almost dropped the whole lot, but those few rescued balls ended up being the crowd’s favorites—crispy, a little lopsided, and devoured before the horses even left the gate. Hosting can be unpredictable, but these olive cheese balls never fail to impress.
Ingredients
- All-purpose flour: This gives the dough its sturdy, shortbread texture—measure it with a gentle hand for just the right crumb.
- Sharp cheddar cheese: Bold cheddar packs tangy flavor that stands out; pre-shredded works, but freshly shredded melts better.
- Unsalted butter: Room temperature is key—cold butter will make mixing tough, so let it soften for effortless blending.
- Cayenne pepper (optional): If you like a tickle of heat, don’t skip this—it lifts the cheese and makes each bite lively.
- Smoked paprika: Adds a subtle smokiness that keeps people guessing at your “secret ingredient.”
- Salt: Just enough to bring out the best in the cheese and balance the olives’ brine.
- Large green olives, pitted: Choose plump, briny olives—Manzanilla is classic, but any firm, pitted variety will do.
- Appetizer-sized skewers or toothpicks: For serving—makes them easy to grab and somehow more festive.
Tired of Takeout? 🥡
Get 10 meals you can make faster than delivery arrives. Seriously.
One email. No spam. Unsubscribe anytime.
Instructions
- Prep the Oven and Pan:
- Set your oven to 400°F (200°C) and line a baking sheet with parchment so nothing sticks.
- Mix Cheese Dough:
- Combine flour, cheddar, softened butter, spices, and salt with your hands—the dough feels crumbly at first, but trust the warmth of your palms to bring it together.
- Divide the Dough:
- Shape the dough into a rough rectangle and slice or pinch it into 24 slightly shaggy pieces; don’t stress perfect math, just aim for consistency.
- Wrap the Olives:
- Take a dough piece, flatten it in your palm, add a green olive, and carefully seal the dough completely before rolling it into a ball—there’s something satisfying about the way the dough hugs each olive.
- Arrange and Chill (Optional):
- Place the balls on your lined tray; for especially tidy shapes, pop them in the fridge for 10 minutes before baking.
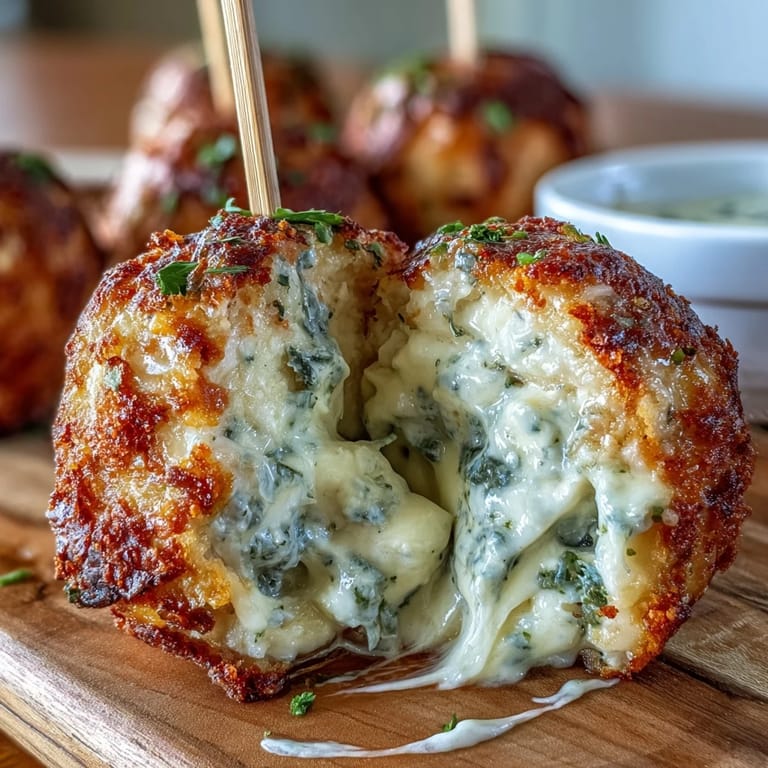
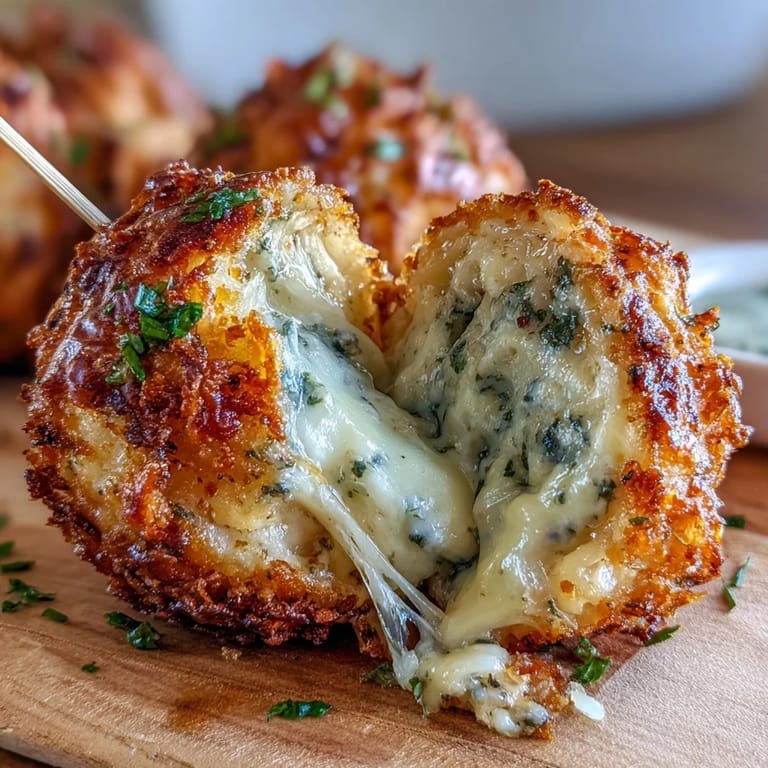
- Bake to Golden:
- Bake the cheese balls for 16 to 18 minutes—watch as they puff and turn deep gold—and let them cool slightly so you don’t burn your fingers.
- Skewer and Serve:
- Once they’re just cool enough to handle, skewer each ball and set them out on a platter to bask in party glory.
 Save to Pinterest
  Save to Pinterest
 Certain dishes create little moments that outshine the party—I’ll never forget standing beside my friend’s kitchen island, both of us snacking on way too many cheese balls, congratulating ourselves on choosing olives over cocktail weenies. It’s funny how a bite-sized treat with crisp edges and gooey cheese can carry a roomful of cheers.
Personalizing Your Cheese Balls
After many batches, I started playing with the add-ins, sneaking in smoked gouda or even a pinch of dry mustard. Swapping in jalapeño-stuffed olives cranked up the flavor, and one guest claimed they could taste a hint of magic in the variation.
Serving Suggestions and Dips
These cheese balls work just as well alongside a bowl of grainy mustard as with a drizzle of bourbon honey dip for a little Derby flair. On especially warm days, I’ll serve them with crisp celery sticks for contrast—guests never see it coming, but the crunch makes everyone smile.
Stress-Free Party Cooking
Mixing the dough ahead of time has rescued more parties than I can count—the cheese balls can even be frozen, then baked straight from the freezer without skipping a beat. Keep a batch tucked away and you’ll always have a savory snack on hand for last-minute gatherings.
- If your dough feels sticky, add a dusting of flour to your hands for easy rolling.
- Chilling before baking gives the balls a tidier look, but isn’t strictly necessary for flavor.
- Check the bottoms for golden color to avoid overbaking.
 Save to Pinterest
 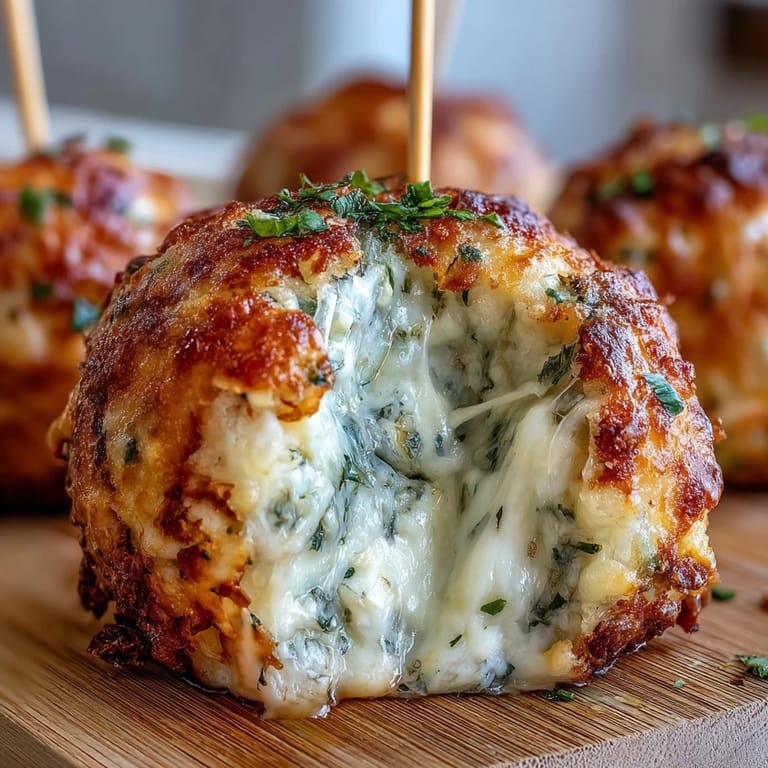 Save to Pinterest
 Whether you’re toasting to a Derby win or simply making Tuesday feel special, these olive cheese balls promise a little joy in every bite. Here’s to appetizers that turn strangers into friends and parties into memories.
Recipe FAQs
- → How do I keep the dough from cracking when wrapping olives?
Work the dough just until it comes together and avoid overworking. If it feels dry, press in a little softened butter. Chilling the formed balls for 10 minutes before baking also helps the seams seal and reduces cracking.
- → Can I swap the cheddar for another cheese?
Yes. Use a firm, flavorful cheese like Gruyère or a sharp Monterey Jack; softer cheeses may need refrigeration before shaping. If using milder cheese, add a pinch more salt or smoked paprika for depth.
- → What olive varieties work best?
Pitted green Manzanilla olives are classic, but black olives or jalapeño-stuffed olives offer different flavor profiles. Adjust the dough seasoning if using briny or spicy olives to balance salt and heat.
- → Can I make these ahead of time or freeze them?
Yes. Assemble balls and freeze them on a tray until firm, then transfer to a sealed bag. Bake from frozen, adding a few extra minutes to the cooking time. You can also shape and refrigerate for up to 24 hours before baking.
- → How should leftovers be stored and reheated?
Store cooled bites in an airtight container in the refrigerator for up to 3 days. Reheat in a 350°F oven for 6–8 minutes to restore crispness. Microwaving will warm them faster but may soften the exterior.
- → What dipping sauces pair well with these skewers?
Grainy mustard, a bourbon-honey dip, tangy aioli, or a spicy mustard are all great matches. Choose a sauce that complements the cheddar and smoked paprika for the best balance.